2024–10–23
Despues de estar usando mas de dos años Startpage como mi preferido buscador, he decidido cambiar lo por mi propio buscador privado usando SearXNG instalado en mi VPS .
SearXNG es un metabuscador privado con codigo abierto totalmente gratuito, que agrega resultados de varios servicios de búsqueda y bases de datos como por ejemplo (Google, Bing, Brave, Qwant, Mojeek, Startpage, Yahoo…) y otros muchas mas. Los usuarios no son rastreados ni perfilados. SearXNG te da la posibilidad de instalar en tu propio servidor y configurar de la manera mas adecuada para tu uso. Pero tranquilo, si no tienes un servidor puedes usar alguna de las instancias publicas creada por otras personas, pero de este modo tendras que confiar en otro y en mi opiñon se le pierde la gracias. Por esto recomiendo que lo instales en tu maquina en casa o VPS, para dar le un uso aun mas privado y configurar a tu gusto.
Descarga asi:
$ git clone https://github.com/searxng/searxng-docker.git
$ cd searxng-docker
$ nano docker-compose.yaml
Despues editar el docker-compose.yaml con el contenido bas abajo .
version: "3.7"

services:
  redis:
    container_name: redis
    image: docker.io/valkey/valkey:8-alpine
    command: valkey-server --save 30 1 --loglevel warning
    restart: unless-stopped
    networks:
      - searxng
    volumes:
      - valkey-data2:/data
    cap_drop:
      - ALL
    cap_add:
      - SETGID
      - SETUID
      - DAC_OVERRIDE
    logging:
      driver: "json-file"
      options:
        max-size: "1m"
        max-file: "1"

  searxng:
    container_name: searxng
    image: docker.io/searxng/searxng:latest
    restart: unless-stopped
    networks:
      - searxng
    ports:
      - "8080:8080"
    volumes:
      - ./searxng:/etc/searxng:rw
    environment:
      - SEARXNG_BASE_URL=https://${SEARXNG_HOSTNAME:-localhost}/
      - UWSGI_WORKERS=${SEARXNG_UWSGI_WORKERS:-4}
      - UWSGI_THREADS=${SEARXNG_UWSGI_THREADS:-4}
    cap_drop:
      - ALL
    cap_add:
      - CHOWN
      - SETGID
      - SETUID
    logging:
      driver: "json-file"
      options:
        max-size: "1m"
        max-file: "1"

networks:
  searxng:

volumes:
  valkey-data2:
En el mismo directorio editamos el archivo .env.
$ nano .env
Ponemos el nombre de noestro dominio:
SEARXNG_HOSTNAME=search.domain.com
$ sed -i -e "s/ultrasecretkey/$(openssl rand -hex 16)/g" searxng/settings.yml
Mis ajustes personales, estan configuradas para usar unico buscador Brave, nada de Google, Bing, DDG etc… Tambien hay otras ajustes, como por ejemplo no mostrar resultados de redes sociales, y dar preferencia en busqueda para sitios como github, blogs, askubuntu, superuser, old.reddit, wikipedia.
$ nano searxng/settings.yaml
Luego copiamos:
# see https://docs.searxng.org/admin/engines/settings.html#use-default-settings
use_default_settings: true

general:
  debug: false
  instance_name:  "Search without being tracked"
  privacypolicy_url: false
  donation_url: false
  contact_url: false
  enable_metrics: true
server:
  secret_key: "ultrasecretkey"
  limiter: false
  image_proxy: true
  method: "GET"
ui:
  # query_in_title: When true, the result page's titles contains the query
  # it decreases the privacy, since the browser can records the page titles.
  query_in_title: false
  infinite_scroll: false
  default_theme: simple
  theme_args:
    simple_style: auto
  # Perform search immediately if a category selected.
  # Disable to select multiple categories at once and start the search manually.
  search_on_category_select: true
  # Hotkeys: default or vim
  hotkeys: default
  # URL formatting: pretty, full or host
  url_formatting: pretty
  # Default interface locale - leave blank to detect from browser information or
  # use codes from the 'locales' config section
  default_locale: ""
search:
  # Filter results. 0: None, 1: Moderate, 2: Strict
  safe_search: 0
  # Existing autocomplete backends: "dbpedia", "duckduckgo", "google", "yandex", "mwmbl",
  # "seznam", "startpage", "stract", "swisscows", "qwant", "wikipedia" - leave blank to turn it off
  # by default.
  autocomplete: "brave"
  # Default search language - leave blank to detect from browser information or
  # use codes from 'languages.py'
  default_lang: "auto"
formats:
    - html
    - json
enabled_plugins:
    - 'Hostnames plugin'
    - 'Tracker URL remover'
# https://docs.searxng.org/src/searx.plugins.hostnames.html
hostnames:
  high_priority:
    - '(.*)\/blog\/(.*)'
    - '(.*\.)?wikipedia.org$'
    - '(.*\.)?github.com$'
    - '(.*\.)?reddit.com$'
    - '(.*\.)?linuxserver.io$'
    - '(.*\.)?docker.com$'
    - '(.*\.)?archlinux.org$'
    - '(.*\.)?stackoverflow.com$'
    - '(.*\.)?askubuntu.com$'
    - '(.*\.)?superuser.com$'
  remove:
     - '(.*\.)?facebook.com$'
     - '(.*\.)?instagram.com$'
     - '(.*\.)?twitter.com$'
     - '(.*\.)?x.com$'
     - '(.*\.)?tiktok.com$'
     - '(.*\.)?medium.com$'
  replace:
    '(.*\.)?reddit.com$': 'old.reddit.com'
    '(.*\.)?redd.it$': 'old.reddit.com'
   #'(www\.)?twitter\.com$': 'nitter.example.com'
   # '(.*\.)?youtube.com$': 'some.piped.com'
    #'(.*\.)?youtu.be$': 'some.piped.com'

engines:
# Disable all Bing
   - name: bing
     disabled: true
   - name: bing images
     engine: bing_images
     disabled: true
   - name: bing news
     engine: bing_news
     disabled: true
   - name: bing videos
     engine: bing_videos
     disabled: true

# Disable all DDG
   - name: duckduckgo
     engine: duckduckgo
     shortcut: ddg
     disabled: true

# Disable all Google
   - name: google
     disabled: true
   - name: google images
     engine: google_images
     disabled: true
   - name: google news
     engine: google_news
     disabled: true
   - name: google videos
     engine: google_videos
     disabled: true
     name: google scholar
     engine: google_scholar
     disabled: true

# Disable Yahoo news
   - name: yahoo news
     engine: yahoo_news
     shortcut: yhn
     disabled: true

# Disable all Qwant
   - name: qwant
     qwant_categ: web
     engine: qwant
     shortcut: qw
     disabled: true
   - name: qwant news
     qwant_categ: news
     engine: qwant
     shortcut: qwn
     categories: news
     network: qwant
     disabled: true
   - name: qwant images
     qwant_categ: images
     engine: qwant
     shortcut: qwi
     categories: [images, web]
     network: qwant
     disabled: true
   - name: qwant videos
     qwant_categ: videos
     engine: qwant
     shortcut: qwv
     categories: [videos, web]
     network: qwant
     disabled: true

# Disable Mojeek
   - name: mojeek
     disabled: true
   - name: mojeek images
     shortcut: mjkimg
     engine: mojeek
     categories: [images, web]
     search_type: images
     paging: false
     disabled: true
   - name: mojeek news
     shortcut: mjknews
     engine: mojeek
     categories: [news, web]
     search_type: news
     paging: false
     disabled: true

# Enable Fdroid
   - name: fdroid
     engine: fdroid
     shortcut: fd
     disabled: false
$ docker compose up -d
Ahora si no devuelva algun error, Searxng debe estar listo !
Configuramos Caddy:
$ sudo nano /etc/Caddyfile
Cambiar
[search.domain.com]con el nombre de noestro dominio. Tambienserver-ip, con el IP del servidor que usamos.
[search.domain] {
    reverse_proxy server-ip:8080
}
Reiniciamos Caddy:
$ sudo systemctl restart caddy
Abrir desde el navegador https://search.domain.com.
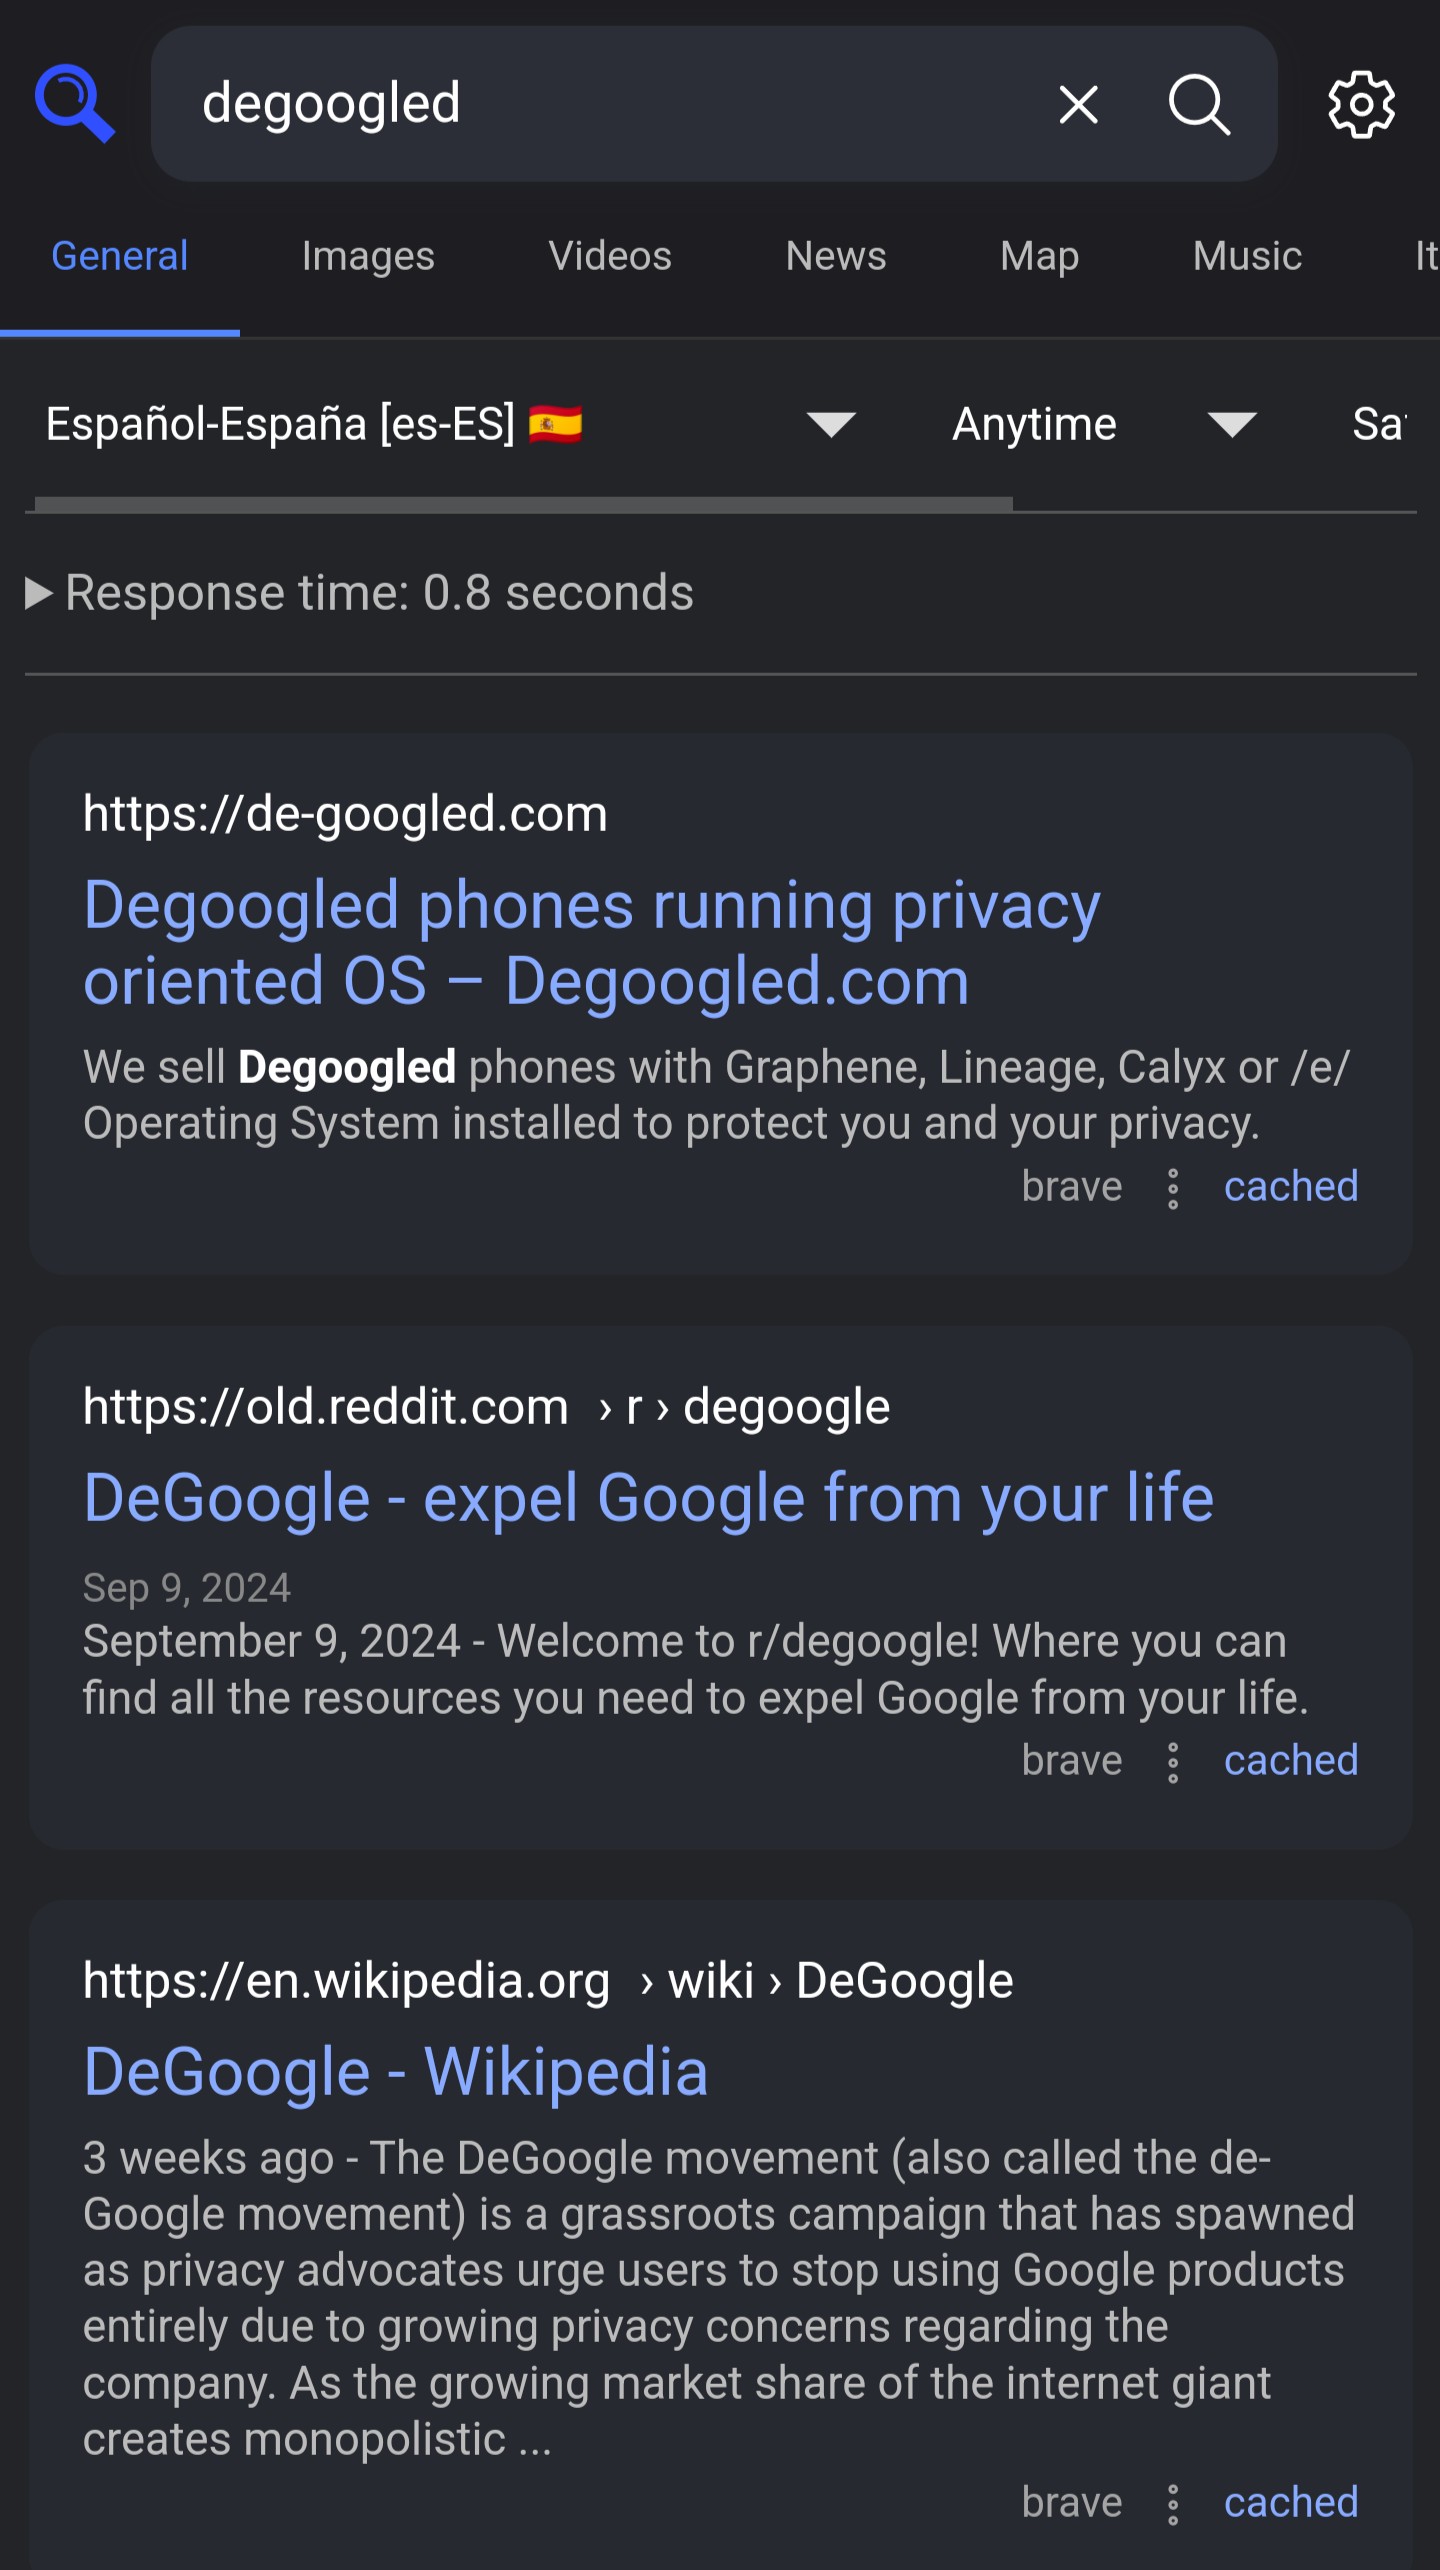
Screenshot desde mi movil
Si no queremos que noestra instancia de Searxng sea publica y todo el mundo tenga acceso, podemos proteger la . La manera mas basica y facil es usando Caddy con basic_auth .
Ejemplo Caddyfile:
# Setup basic authentication
(basic_auth) {
  basic_auth {
    <username> <hashed password>
  }
}

search.domain.com {
    import basic_auth
    reverse_proxy server-ip:8080
}
Tenemos que poner un nombre de usuario donde <username> y una contraseña donde <hashed password> .
La contraseña tiene que ser en formato
hashy no en texto plano .
Ejemplo:
Obtener el hash de la contraseña searxngcontraseña
$ caddy hash-password searxngcontraseña
Mas info caddy hash-password.
Para proteger mejor SearXNG, a vez de usar Basic Auth como el ejemplo arriba, podemos usar Authentik.
Una vez instalado configuramos la aplicacion de SearXNG.
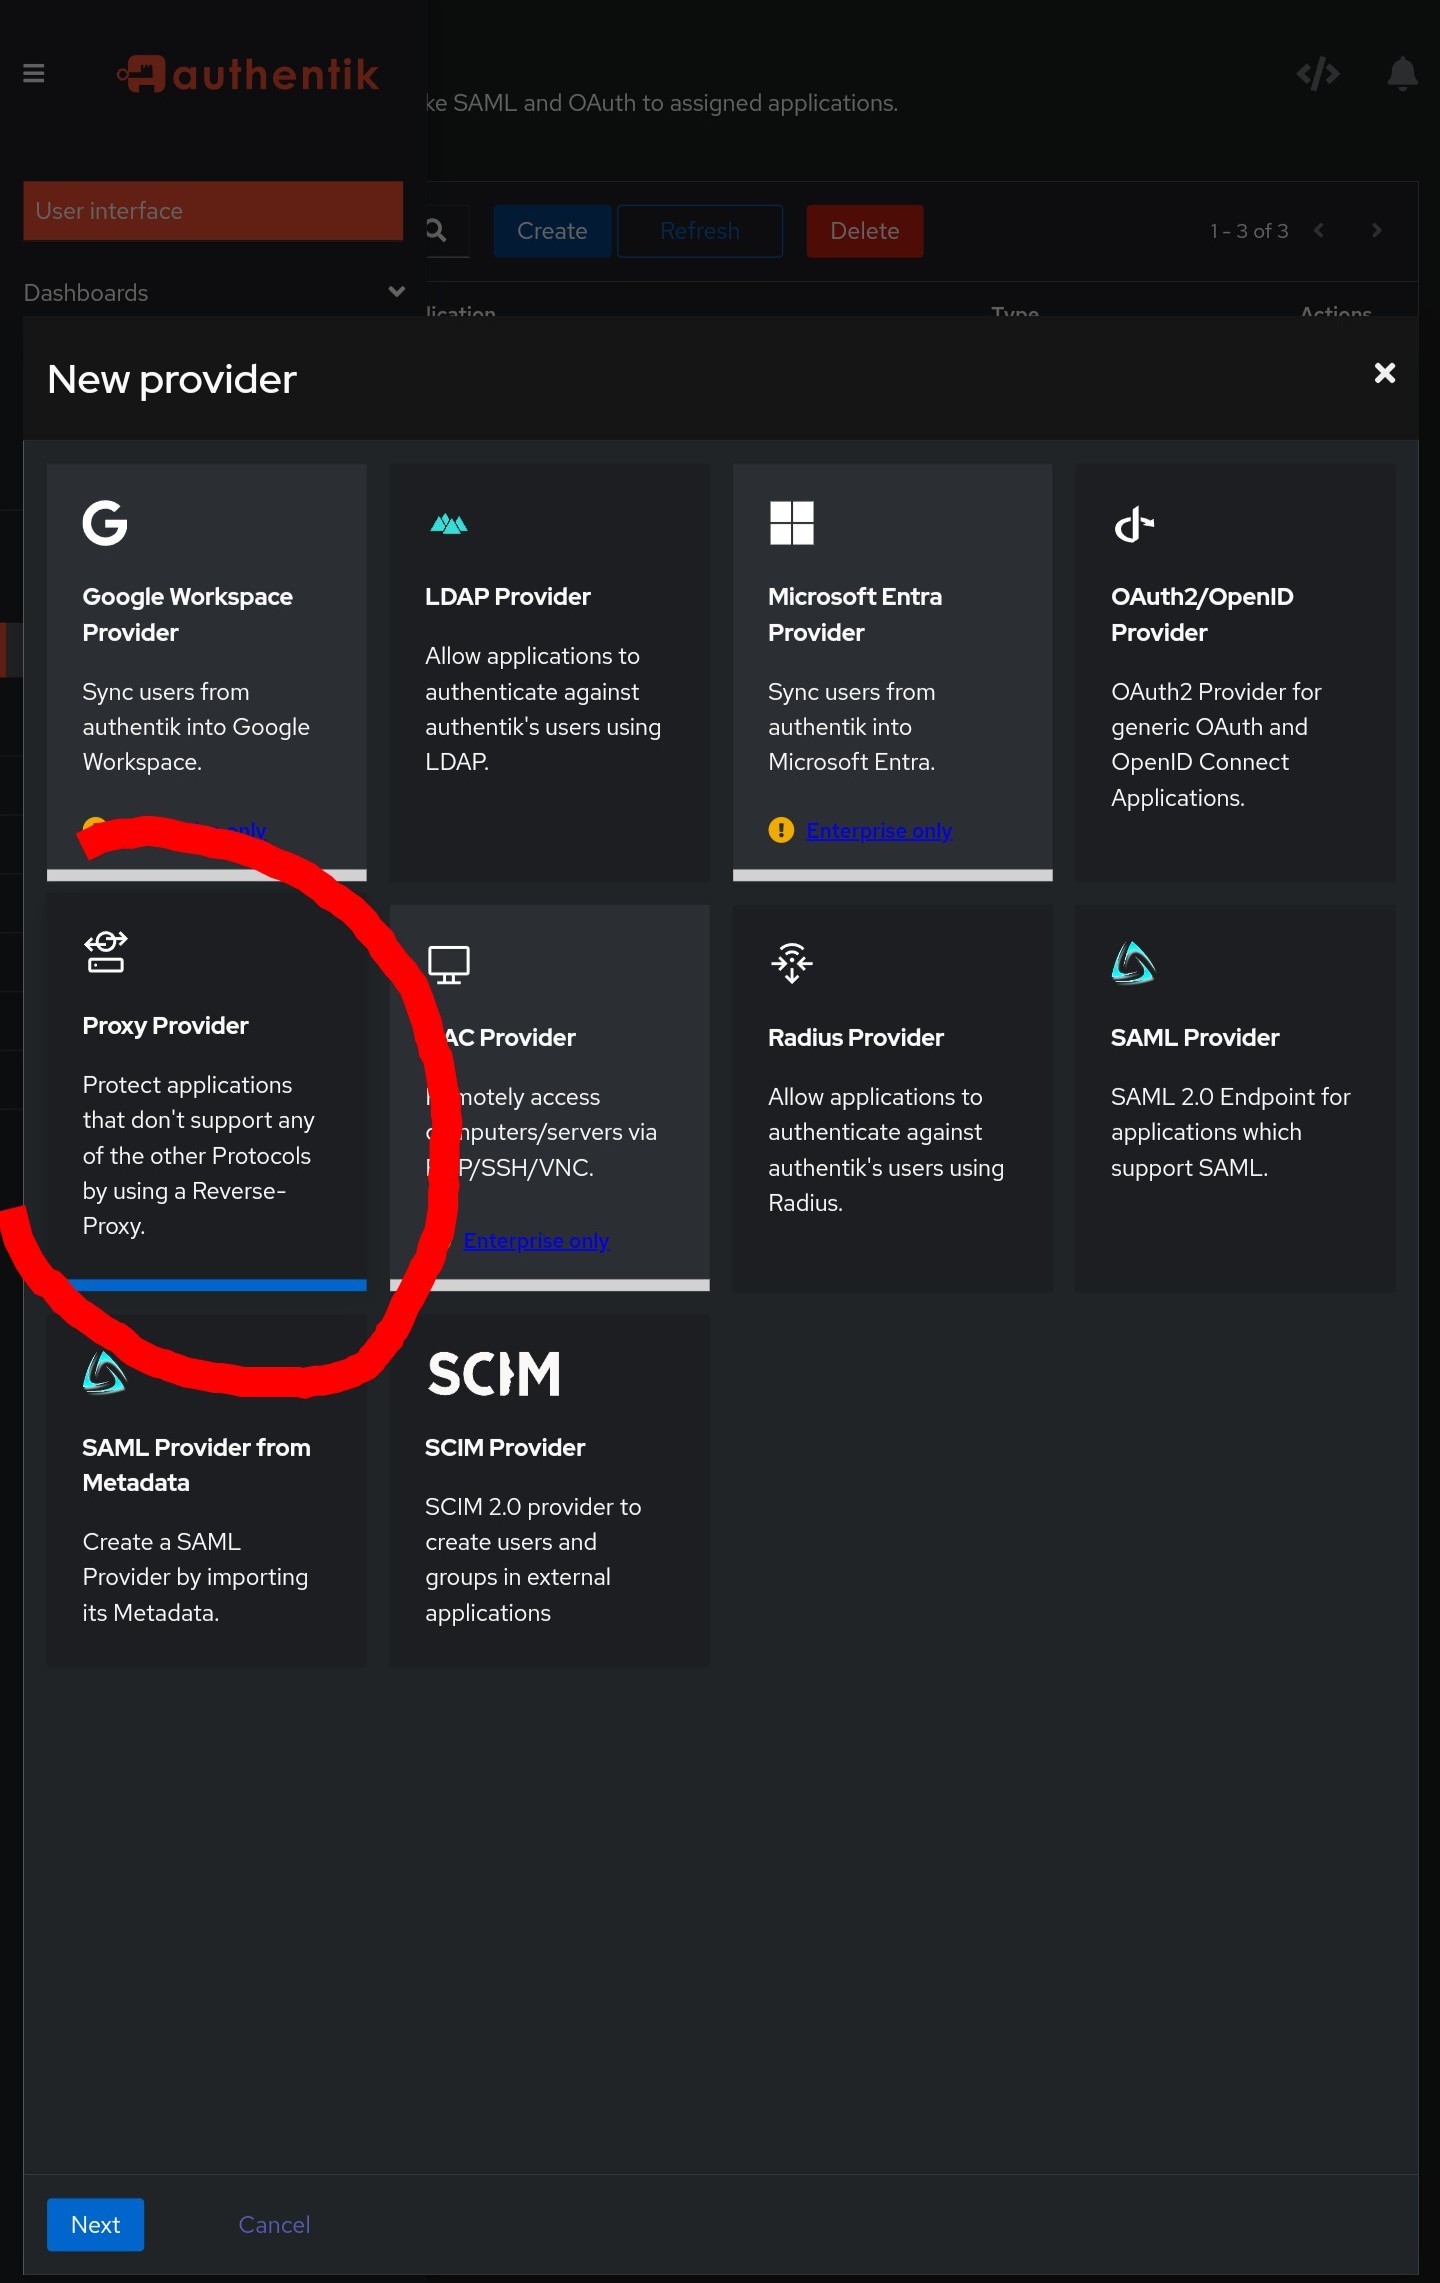
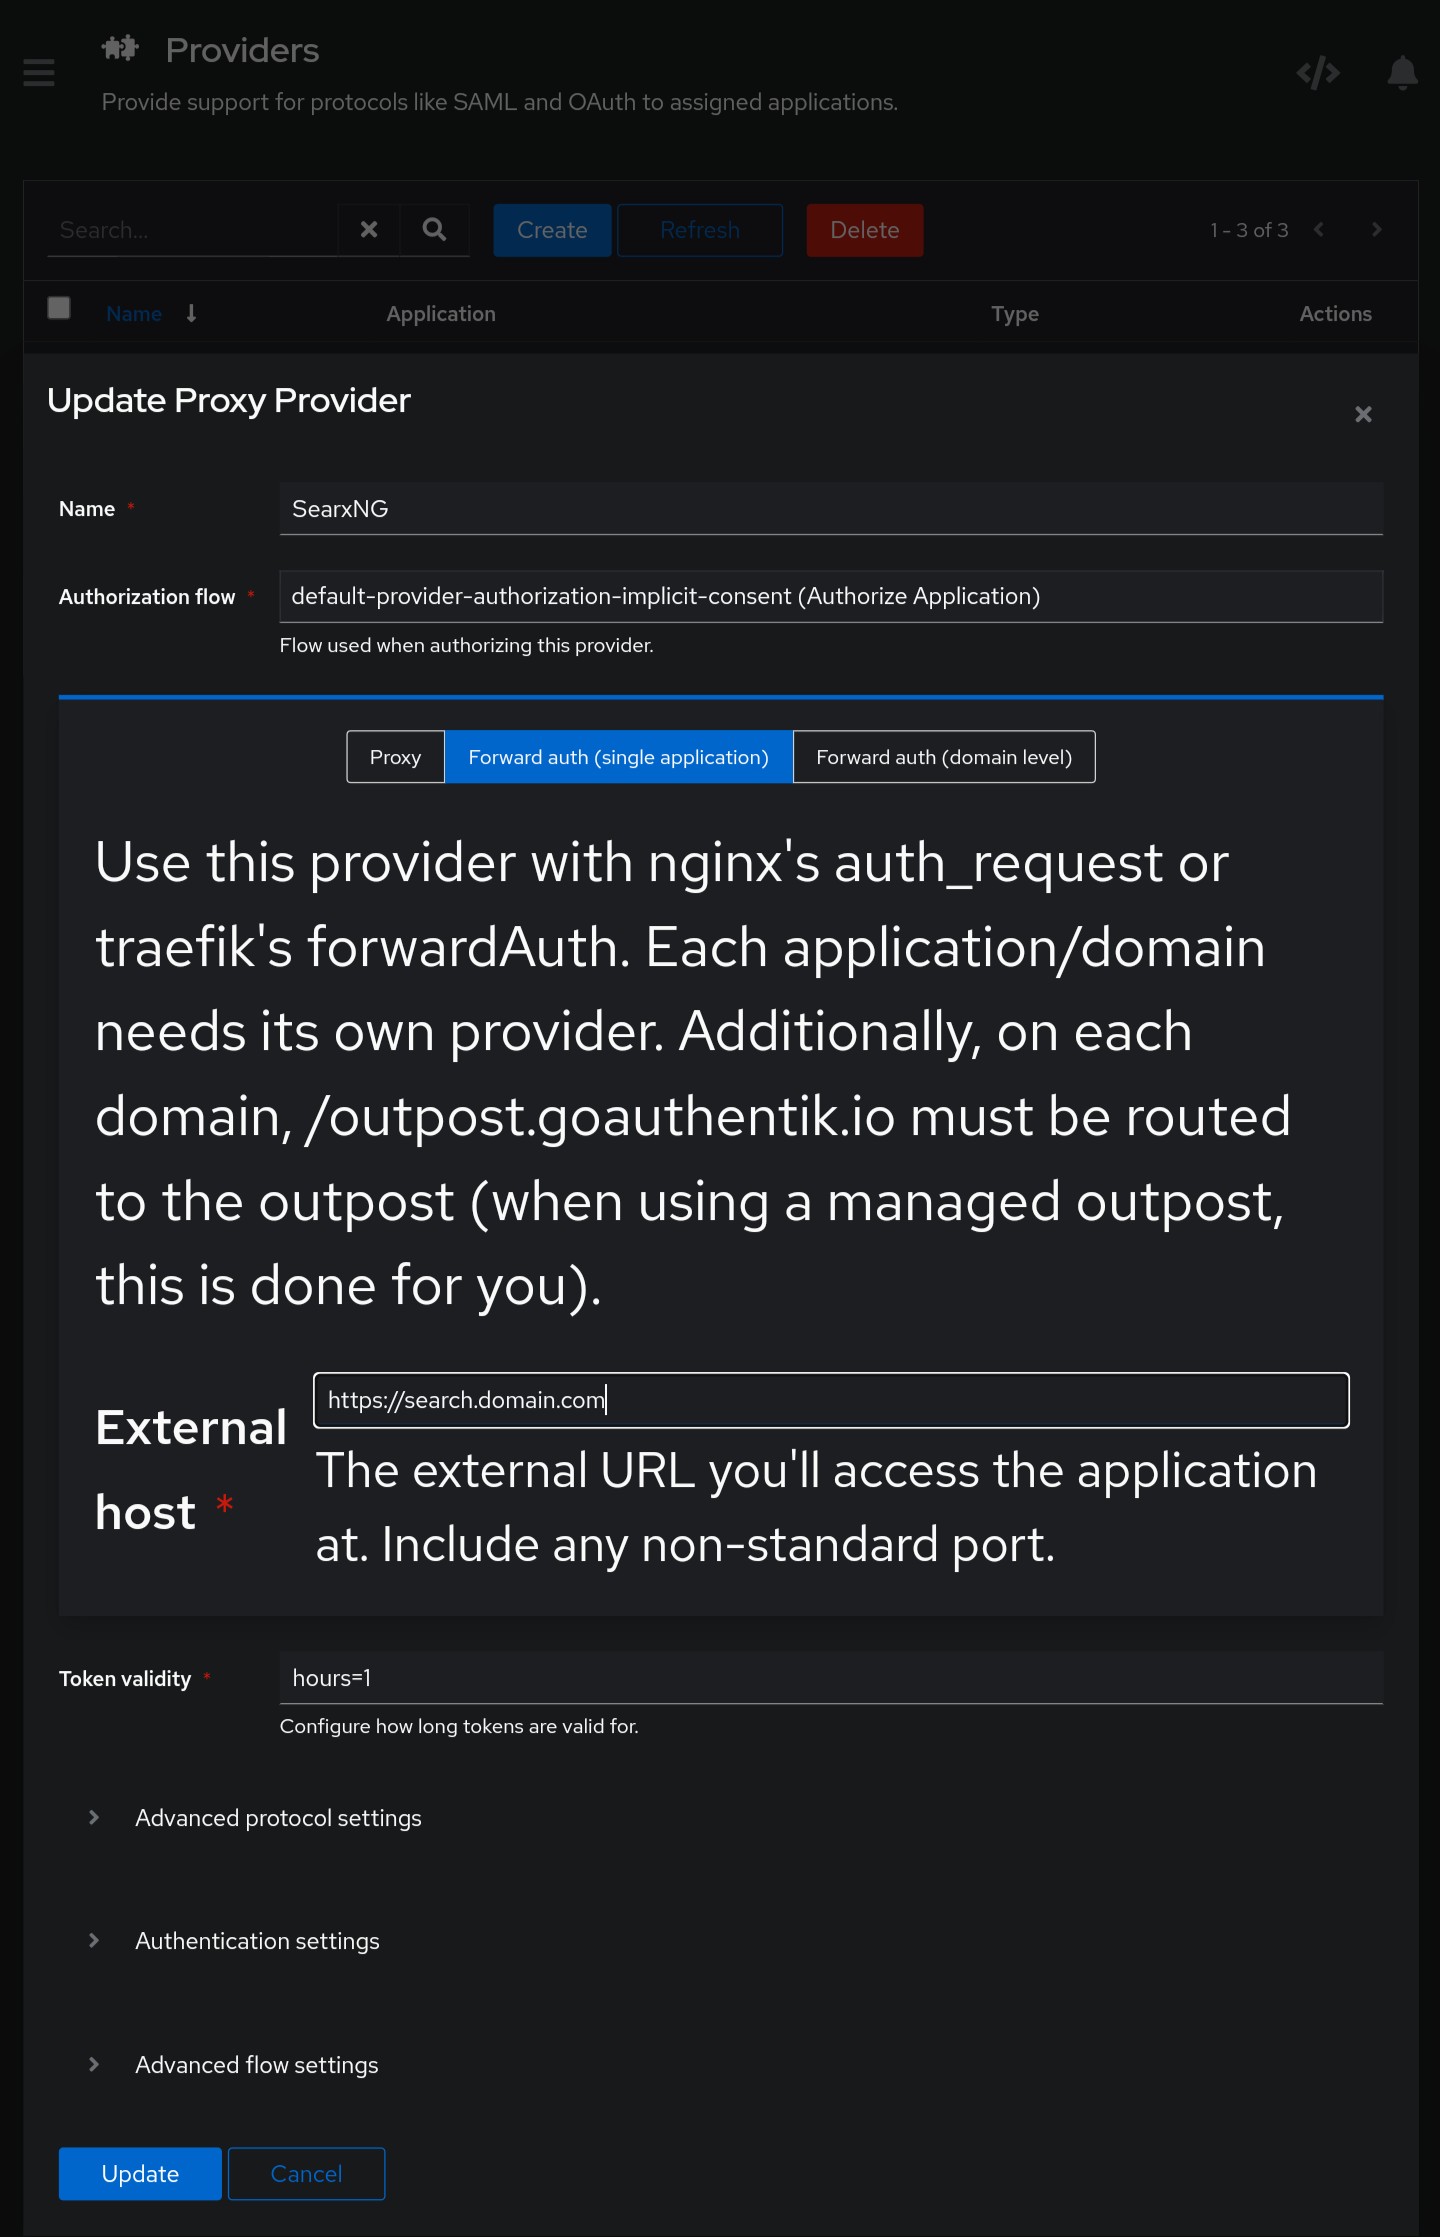
1) Abrimos Authentik
2) Vamos a la opcion “Aplications/Providors” => “Create” .
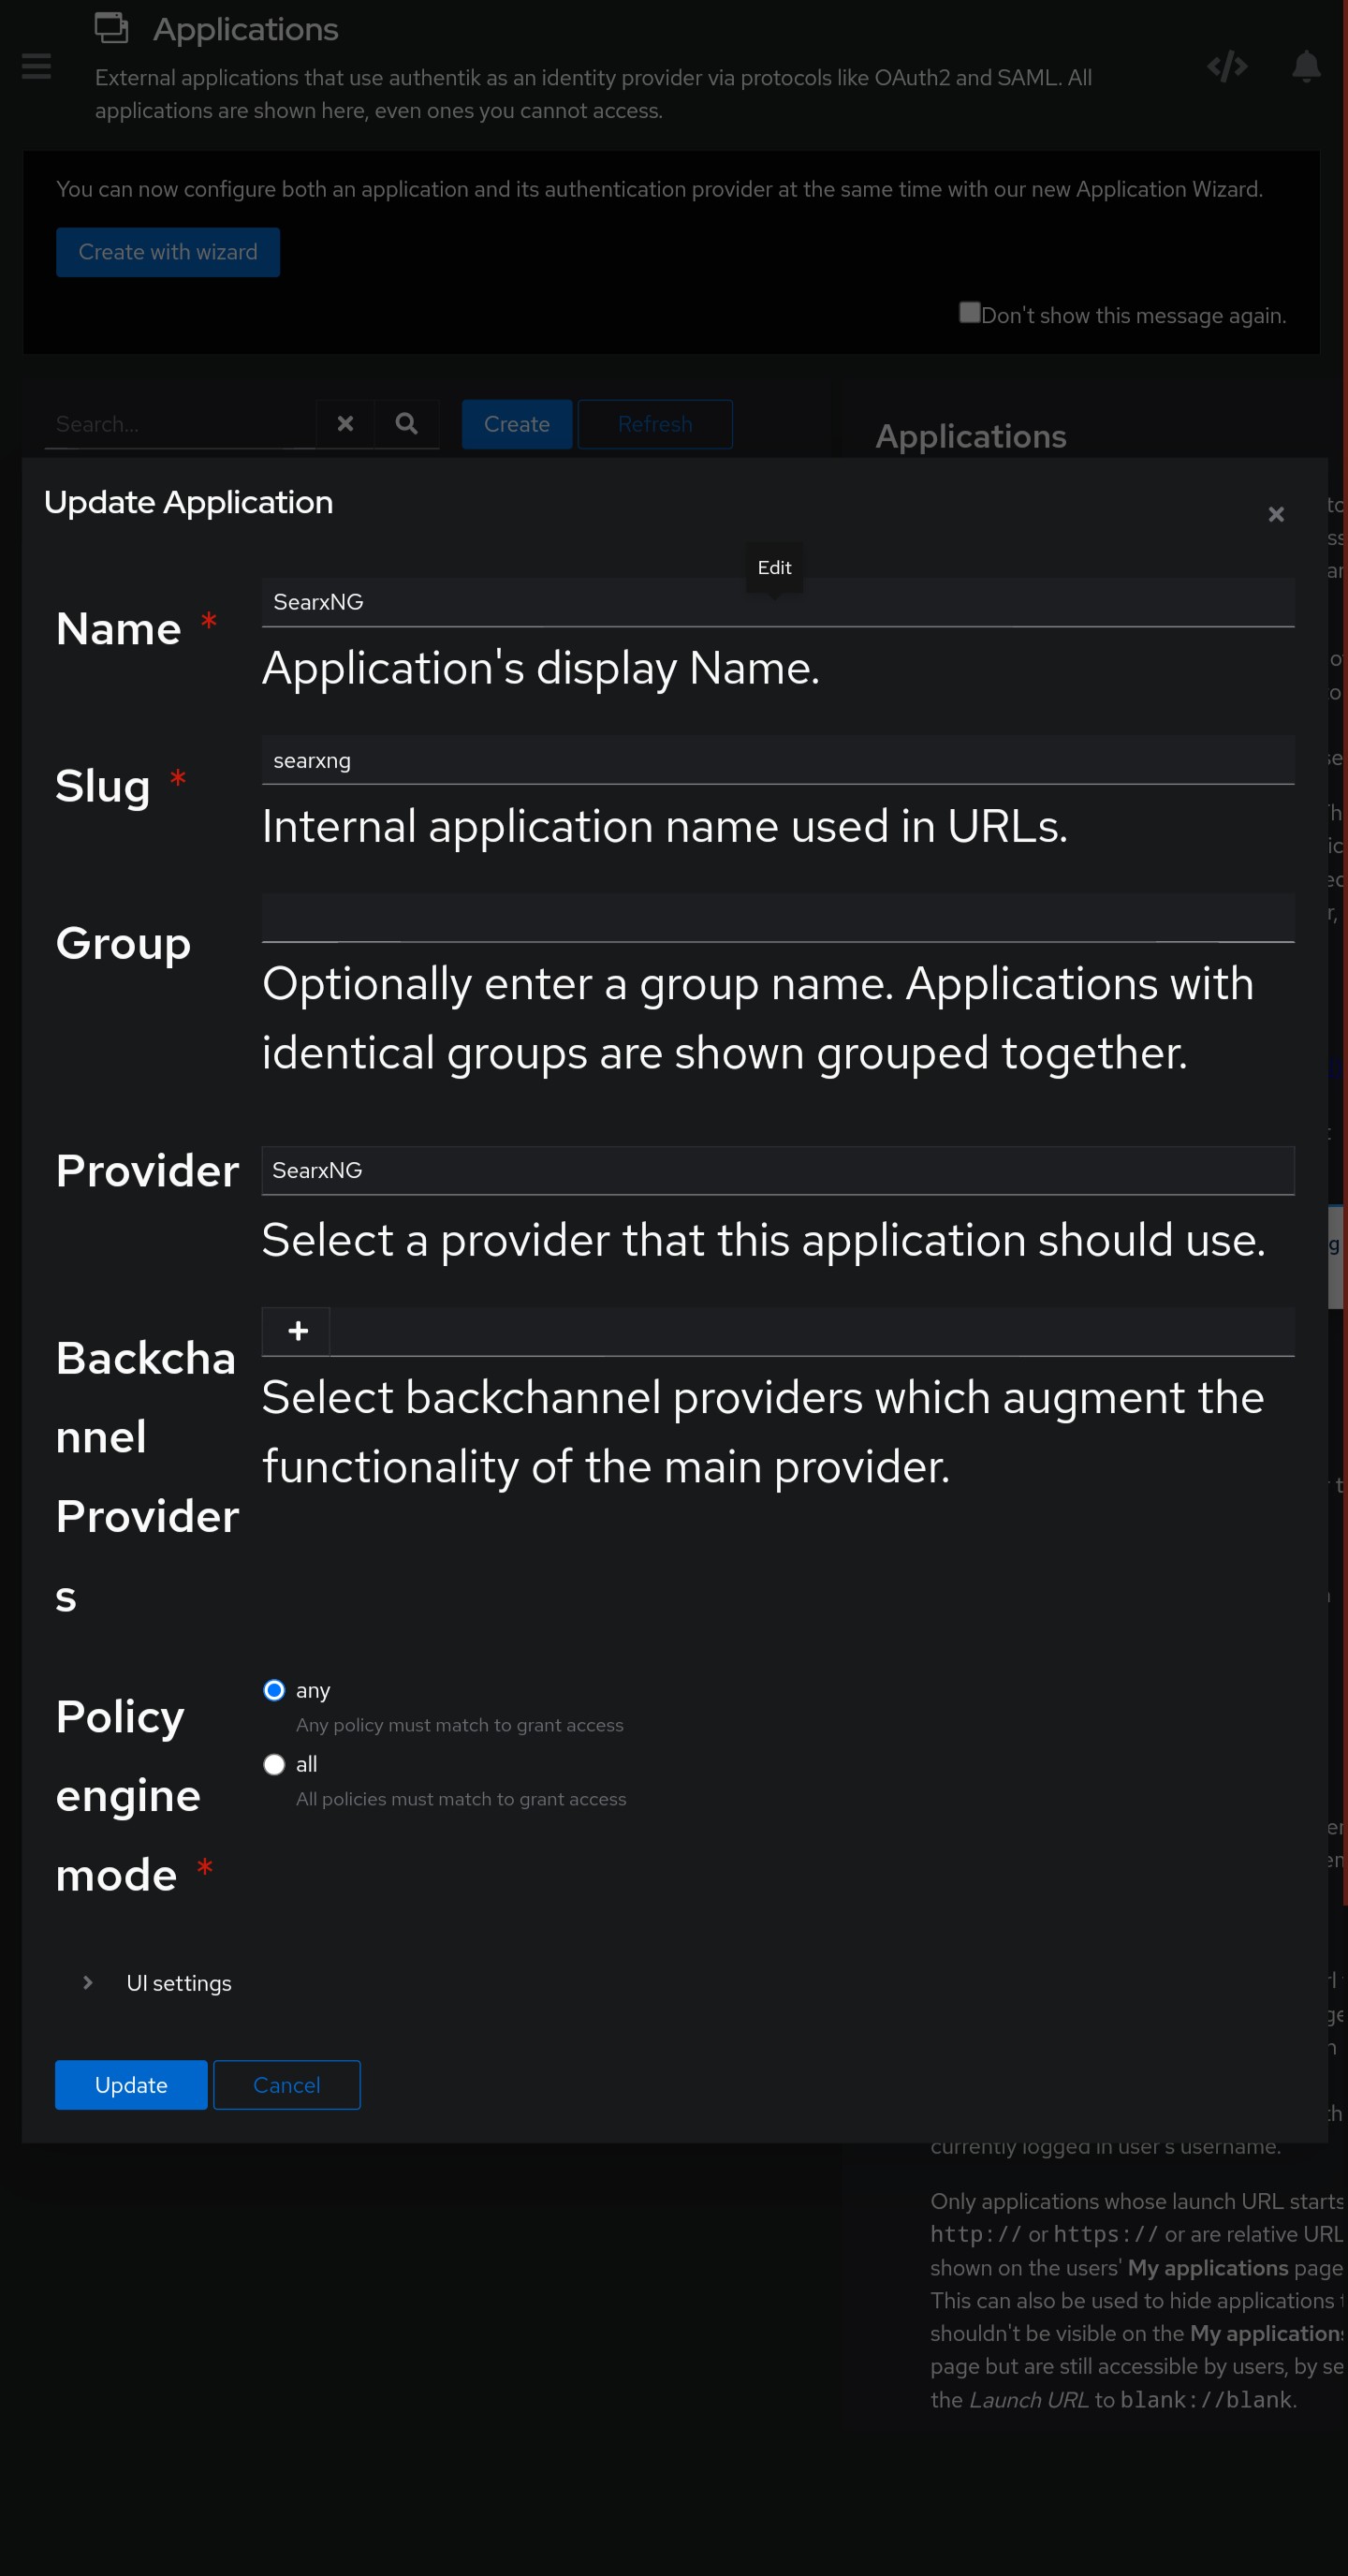
3) Vamos a la opcion “Aplications/Aplications” => “Create” .
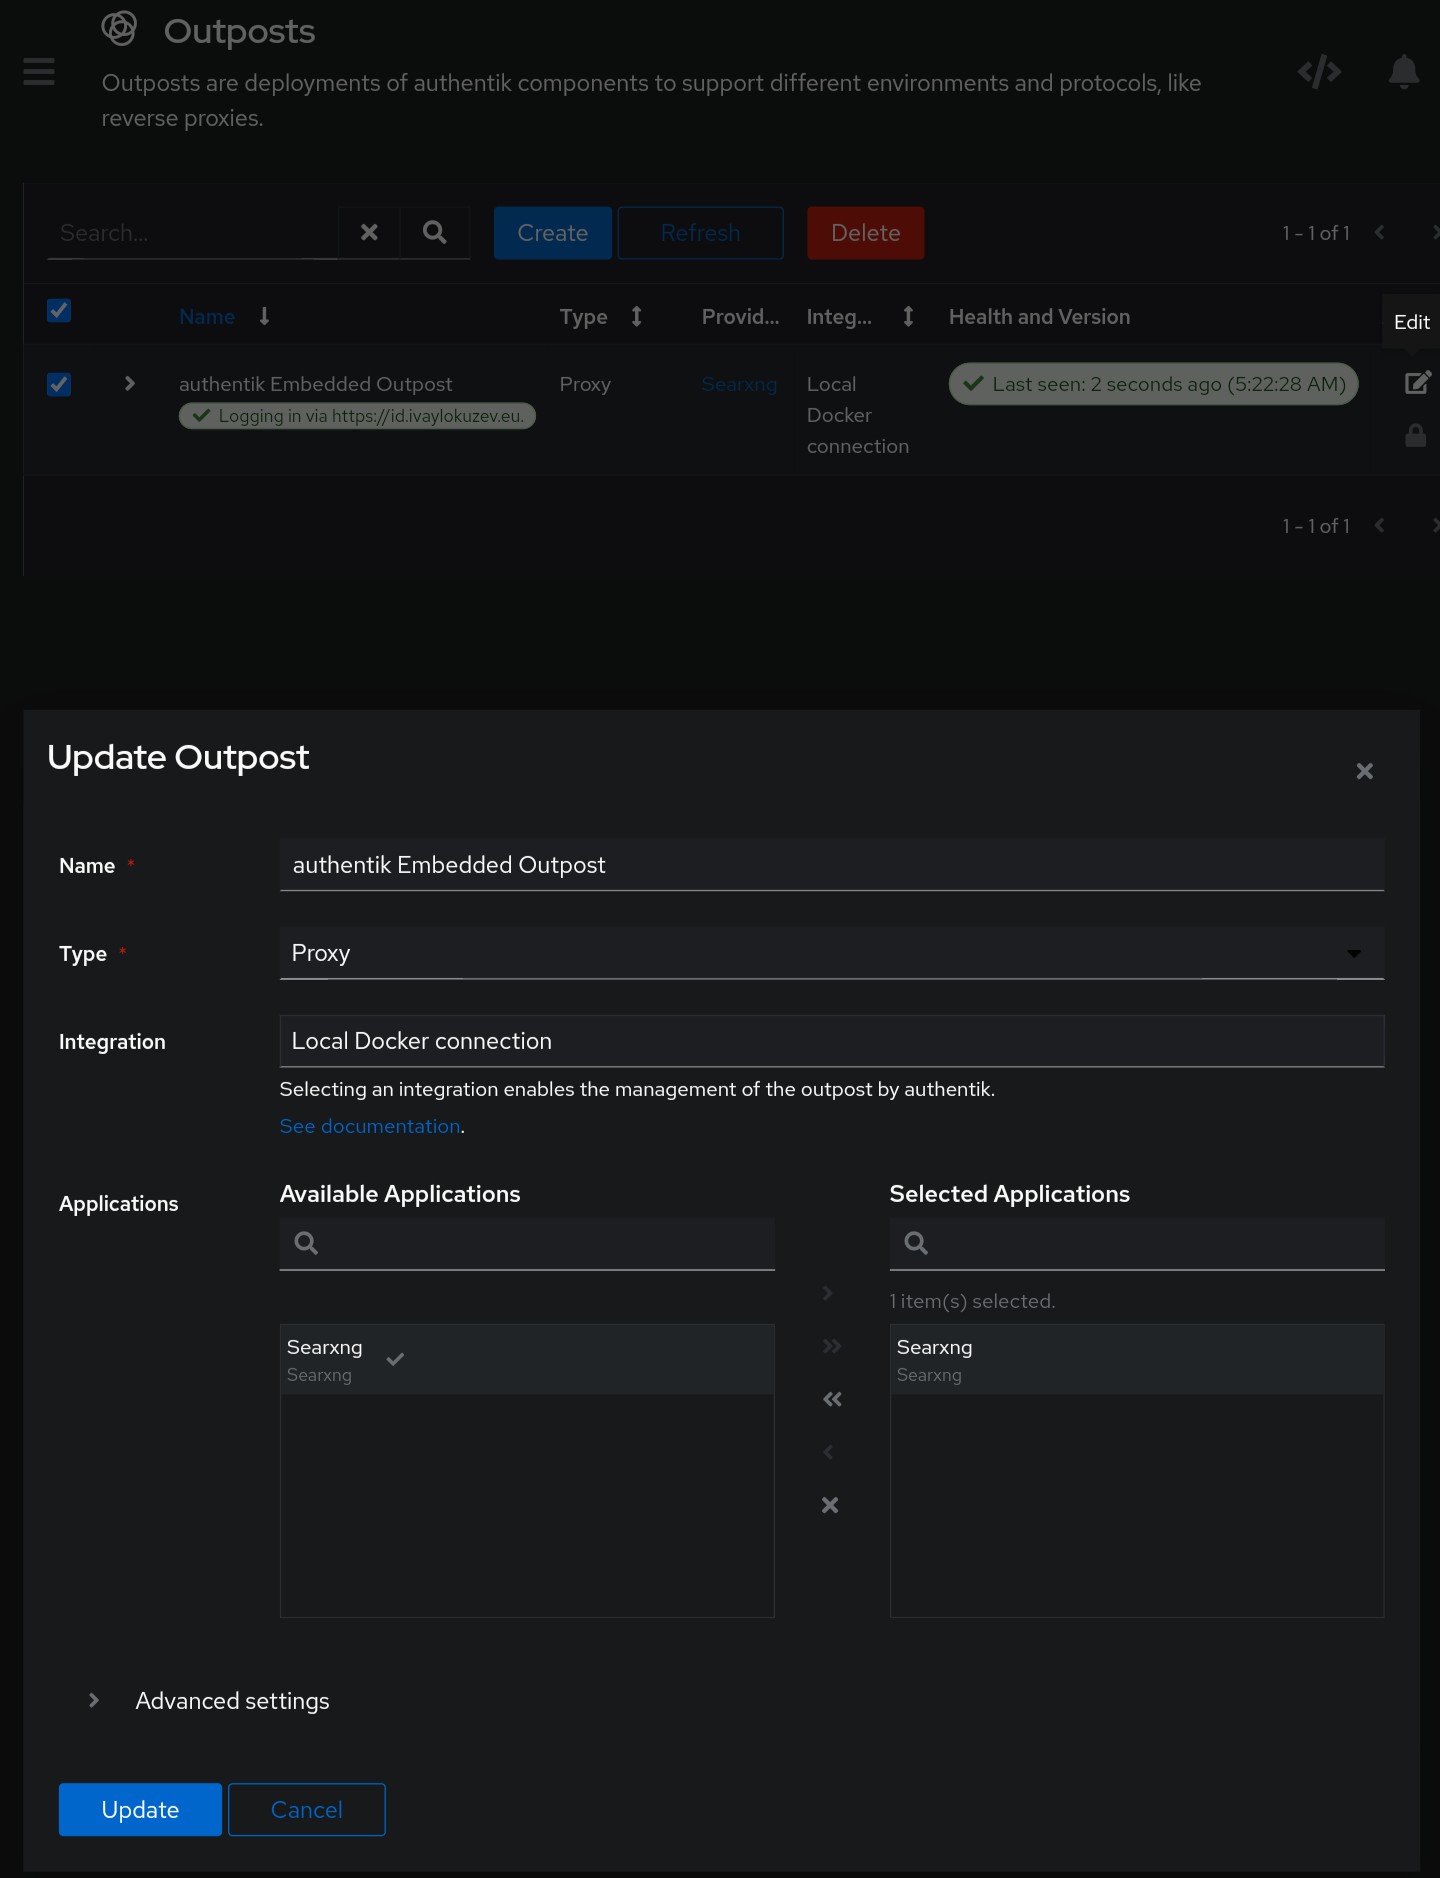
4) Vamos a la opcion “Aplications/Outposts” => “Editamos el main Outpost(s)” igual que la fotos abajo.
5) Vamos a “Settings” => “MFA Devices” => “Enroll”, eligimos el metodo de segundo factor que vamos a usar (Static Tokens, TOTP Device o WebAuthn).
Sustituir
authentik.mydomain.com,search.mydomain.comapuntando a voestro dominio.com
(authenticate) {
        reverse_proxy /outpost.goauthentik.io/* http://authentik.mydomain.com:9000
        forward_auth http://authentik.mydomain.com:9000 {
                uri /outpost.goauthentik.io/auth/caddy
                copy_headers X-Authentik-Username X-Authentik-Groups X-Authentik-Email X-Authentik-Name X-Authentik-Uid X-Authentik-Jwt X-Authentik-Meta-Jwks X-Authentik-Meta-Outpost X-Authentik-Meta-Provider X-Authentik-Meta-App X-Authentik-Meta-Version
                trusted_proxies private_ranges
        }
}

authentik.mydomain.com {
    reverse_proxy 12.34.56.789:9000
}

search.mydomain.com {
    import authenticate
    reverse_proxy 12.34.56.789:8080
}
Reiniciamos Caddy:
$ sudo systemctl restart caddy
Apartir de ahora cuando abrimos noestra instancia de SearXNG, nos va a pedir poner los credenciales, nombre de usuario, contraseña y el segundo factor que hemos elegido.